
This quick AWS Lightsail WordPress setup will guide you through how to setup your WordPress website on Amazon’s cloud service in a matter of minutes.
AWS Lightsail is a cloud computing service offered by Amazon Web Services (AWS) that simplifies the process of launching and managing virtual private servers (VPS). It’s designed to be user-friendly and cost-effective, making it a popular choice for small businesses, developers, and students.
After years of developing WordPress websites for personal use and for clients, I have landed on AWS Lightsail for personal and small business use cases. I like it because it has affordable pricing for hosting WordPress sites. It doesn’t have all the bells and whistles that more expensive WordPress hosts offer, but most of the time I don’t need the bells and whistles.
You can start a WordPress site on AWS Lightsail for as low as $3.50/month, which is one of the most affordable options I’ve found on the internet.
So if you’re ready to get started, let’s begin with our AWS Lightsail WordPress setup.
The first step is to buy your domain name. There are lots of options for buying a domain name, but I personally prefer GoDaddy. I like GoDaddy because it’s simple to configure their DNS settings. This will be important when you get to step 4 of this AWS Lightsail WordPress setup guide.
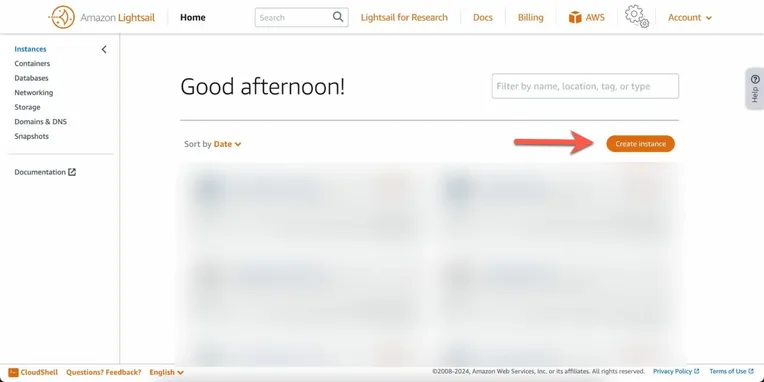
If you don’t already have an account on AWS, then you need to create one. Then head to the Lightsail dashboard. You’ll select “Create Instance”
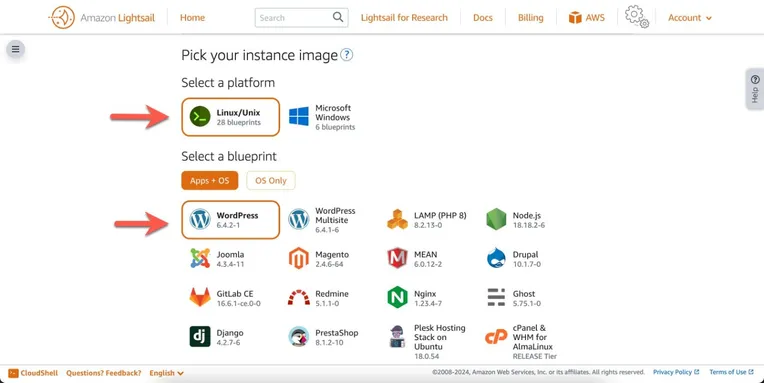
Next, you’ll make sure that WordPress is selected as your instance type.
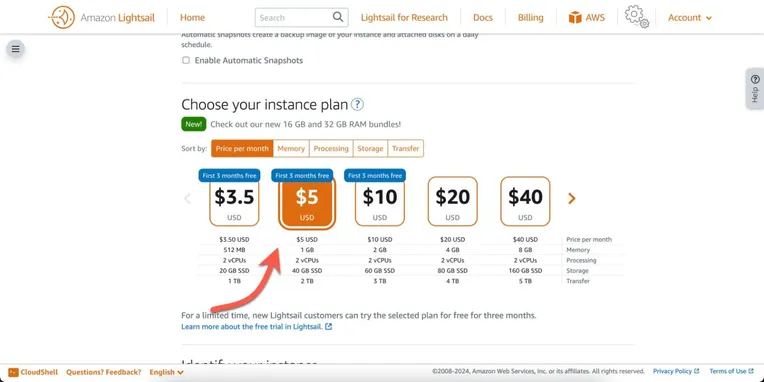
Next, you’ll select the plan you want. Most of my sites are the $5/month plan. This gives you a good amount of memory to run your site. For $5, you get 1 GB of memory, 2 vCPUs, 40GB of storage, and 2TB transfer speed. This can always be upgraded later if your business grows and you need more performance.
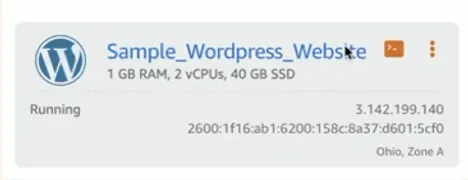
Lastly, give your instance a name. It can be whatever you choose. It’s simply for your reference later. You’ll click “Create Instance” to finish this step.

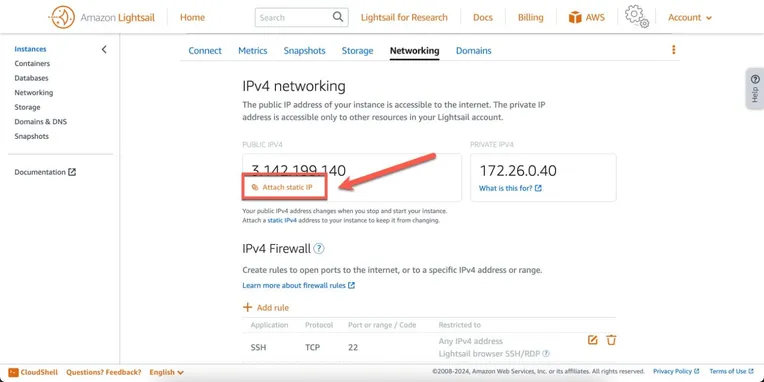
As someone recently pointed out to me, each Lightsail instance gets one static IP address at no additional cost. The purpose of a static IP address is to ensure that when you reboot the server, you continue to have the same IP address. If your IP address were to change every time the server reboots, then you would also need to update your DNS records (at GoDaddy or your domain registrar of choice) every time to avoid downtime on your website.
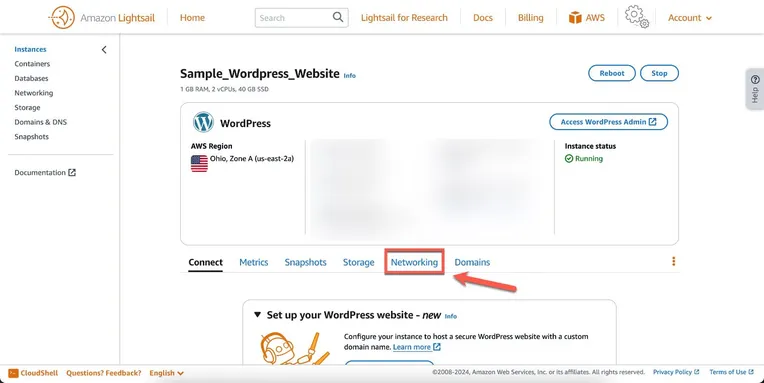
To assign a static IP Address, you’ll click on the 3 dots in the top right corner of your instance box. Then select “Manage”.
Click the”Networking” tab to open up your networking options.
Next, you’ll click “Attach static IP” to create and assign a new static IP address to your bitnami AWS lightsail wordpress instance.
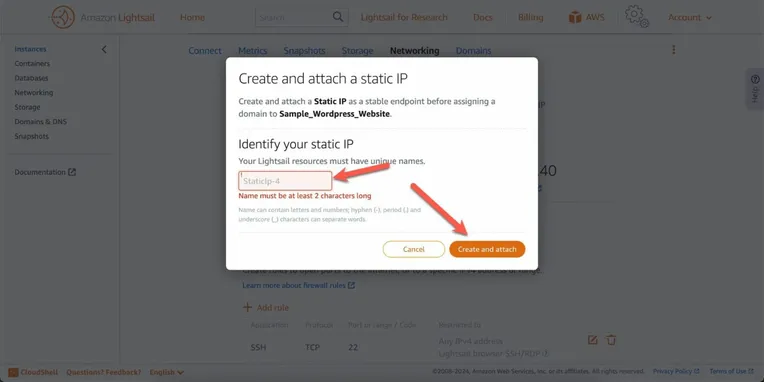
Lastly, create a name for the static IP and click “Create and attach”. Again, the name is simply for your reference later.
Now, you’ll have a public IP address that you can copy and save for the next step in the process.
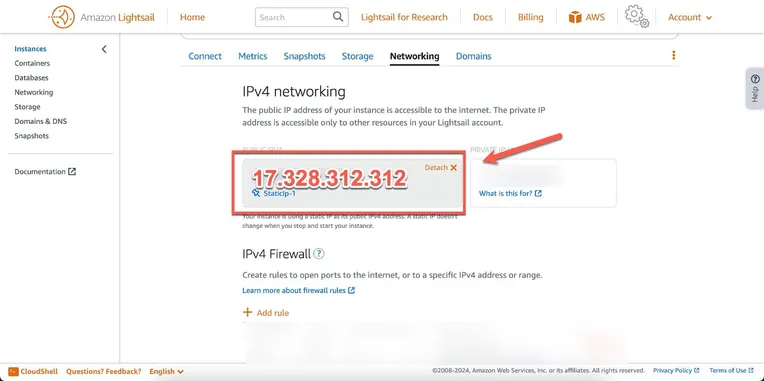
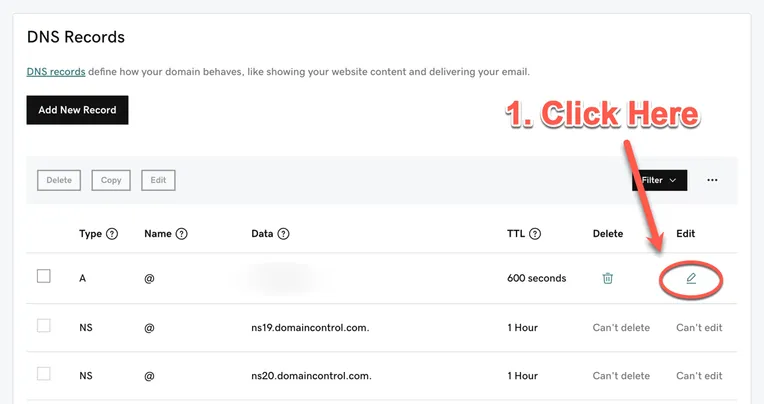
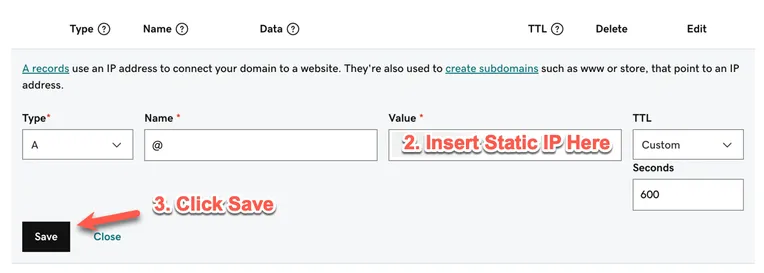
Now that you have your new static IP address, you need to copy it and update your DNS records at GoDaddy (or wherever you bought your domain). Specifically, you’ll need to update your “A” record. Update the value and change it to the static IP address.
After you save your DNS record, you’ll need to wait a few minutes. Try visiting your website to see if the default website that Bitnami creates opens up.
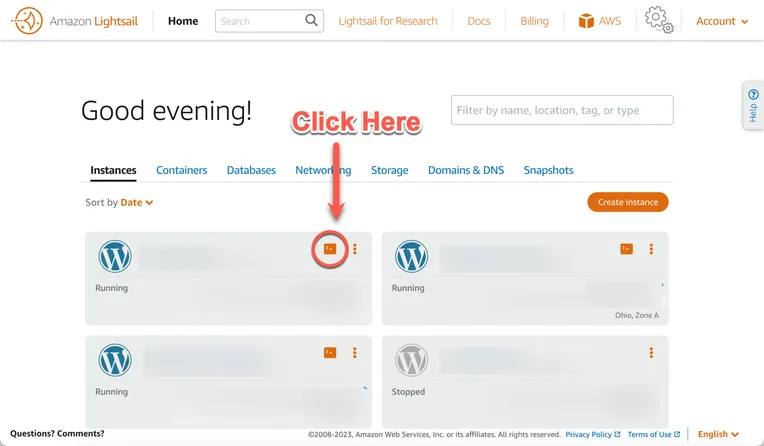
Now that your web address is pointing to your website, it’s time to implement some security. The first thing we’re going to do is add a free SSL certificate provided by Let’s Encrypt. To do this, go back to your AWS Lightsail dashboard and click on the SSH terminal icon as pictured below on the specific instance you created.
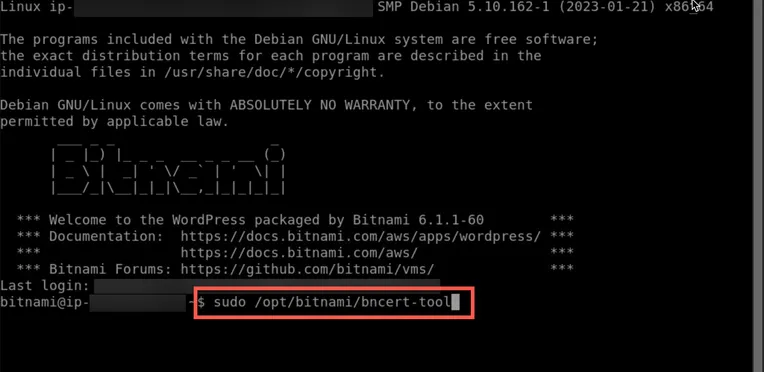
Once you open the virtual terminal window, you’ll enter the following prompt:
sudo /opt/bitnami/bncert-toolThis will start the SSL certificate tool
Steps:
While you are connected to the SSH terminal, it’s a good idea to go ahead and get your default user credentials. By default, your AWS Lightsail WordPress site will be created with a user named “user”. But a random password is created at the time of installation. To get this random password, you’ll need to type the following command in the terminal:
cat bitnami_application_passwordThis will make your default user’s password show up on the screen. You can now copy this password and visit www.yourdomain.com/wp-admin to login to your website using “user” as the username and the default password.
Once you are logged into your wordpress website, you should create a new user for yourself.
That’s it! Congratulations. You’ve successfully setup a WordPress site on AWS Lightsail. If you have any questions or come across any challenges that aren’t addressed in the tutorial, feel free to leave a comment below. Also, in the future if you need help with a Bitnami PHP update, we’ve got you’ve covered.